


Vinyl siding is a popular choice for homeowners looking to enhance the exterior appearance of their homes. However, there comes a time when you might need to remove it, whether for replacement, repair, or aesthetic change. This comprehensive guide will walk you through the process of removing vinyl siding safely and efficiently.
Reasons to Remove Vinyl Siding
There are multiple reasons why you might want to remove vinyl siding from your home. Here are a few:
- Damage Repair: Over time, vinyl siding can become cracked or damaged due to weather conditions or impact.
- Updating Appearance: You might be looking to change the look of your home with new siding or paint underneath.
- Structural Investigation: Sometimes, to investigate possible structural issues within the wall.
- Replacing with New Material: Moving to a different siding material for better insulation or an updated look.
Tools Needed for Vinyl Siding Removal
Before starting the removal process, ensure you have the necessary tools:
- Pry bar
- Hammer
- Zip tool (siding removal tool)
- Utility knife
- Safety goggles
- Work gloves
- Ladder
Having the right tools will make the process smoother and safer.
Safety First
Safety should always be your top priority when doing any home improvement project. Before you start removing vinyl siding, consider the following safety tips:
- Wear Protective Gear: Always wear safety goggles and work gloves.
- Use Ladders Safely: Ensure your ladder is stable, and always have someone to assist you if possible.
- Mind the Weather: Avoid working during windy or wet conditions that could make the job more hazardous.
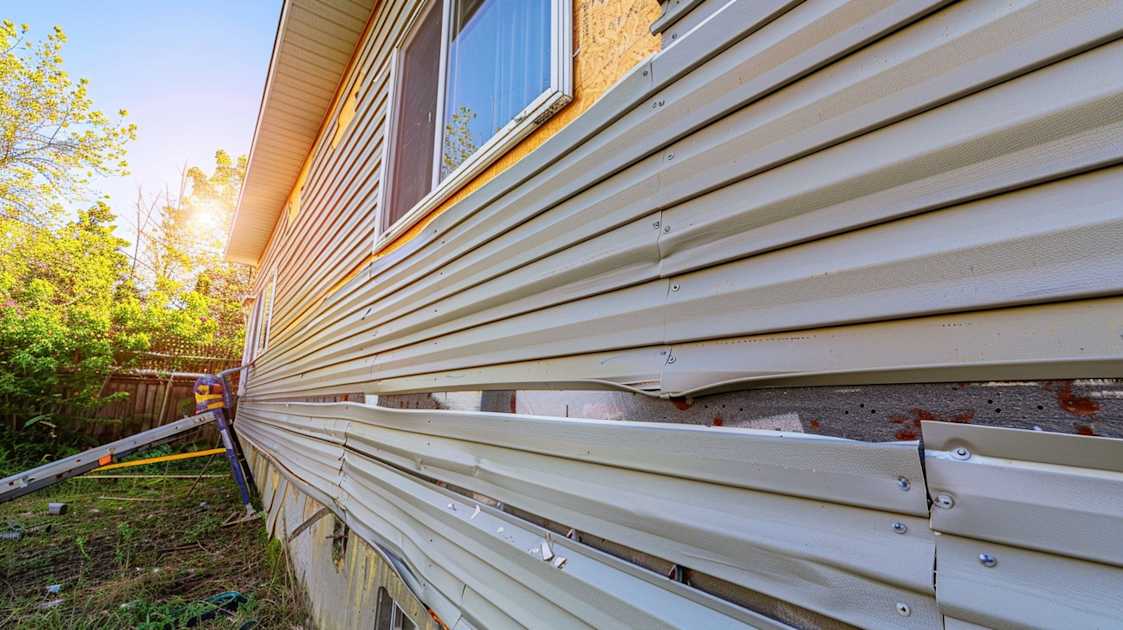
Step-by-Step Guide to Removing Vinyl Siding
Step 1: Inspect the Siding
Before starting, inspect the entire surface to understand how it is attached and where you should begin. Identify any damaged or loose sections that might require more attention.
Step 2: Find the Starting Point
Locate the first piece of vinyl to remove. Typically, it’s best to start at a corner or around doors and windows where the siding naturally terminates.
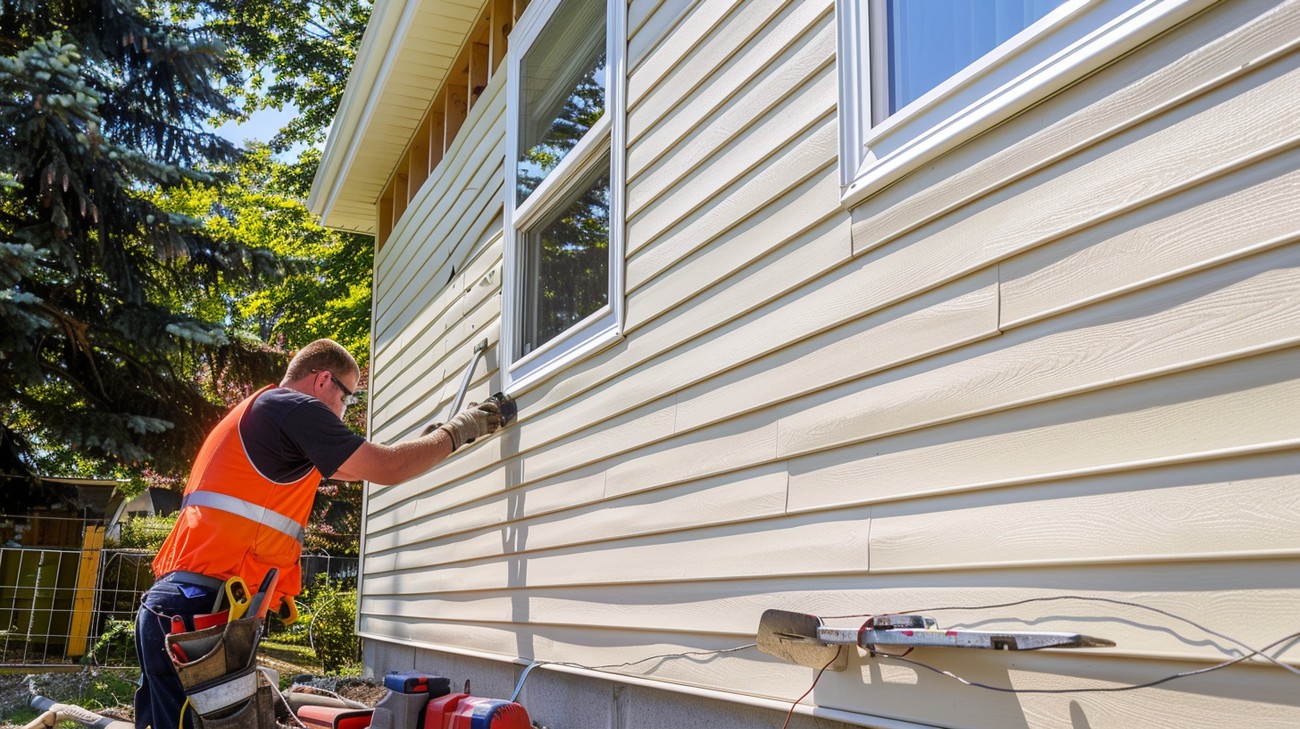
Step 3: Use the Zip Tool
The zip tool will be your best friend. It helps separate the vinyl siding panels from each other. Slide the tool under the overlap of the vinyl panel and pull downward. This will unlock the panels.
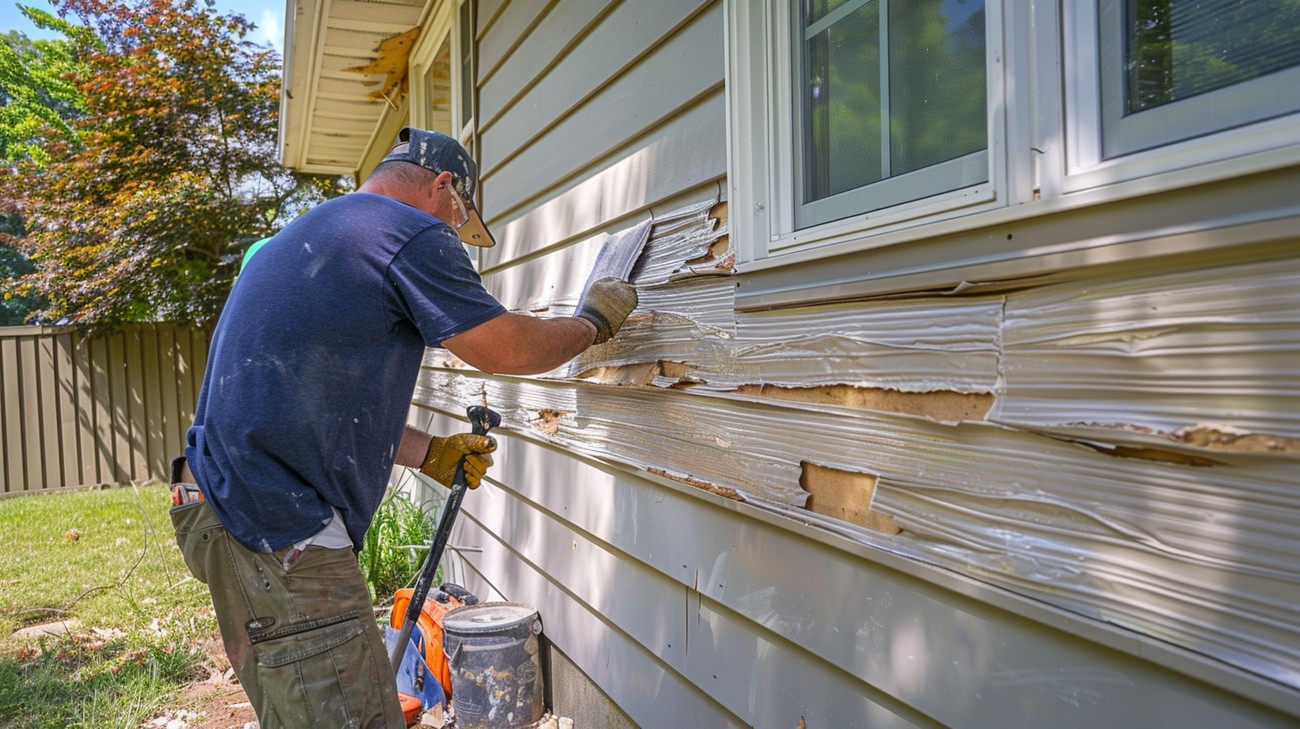
Step 4: Remove Fasteners
Once the panels are unlocked, use the pry bar or hammer to gently remove the nails or screws fastening the siding. Be careful to avoid damaging the panels if you intend to reuse them.
Step 5: Work in Sections
Remove the siding in sections, working your way from the top of the house down to the bottom. This method allows gravity to help in the removal process and reduces the risk of pieces falling.
Step 6: Detach Siding Completely
After removing the fasteners and unlocking the panels, carefully pull the vinyl siding away from the house, ensuring it does not snag or tear.
Handling and Disposal of Removed Siding
Once removed, you should handle the vinyl siding responsibly. Here’s how:
- Donate or Recycle: If still in good condition, consider donating or recycling the panels.
- Dispose Properly: If unusable, take them to a certified recycling facility or ask your local waste management service about disposal options.
Challenges You Might Encounter
Removing vinyl siding can pose several challenges:
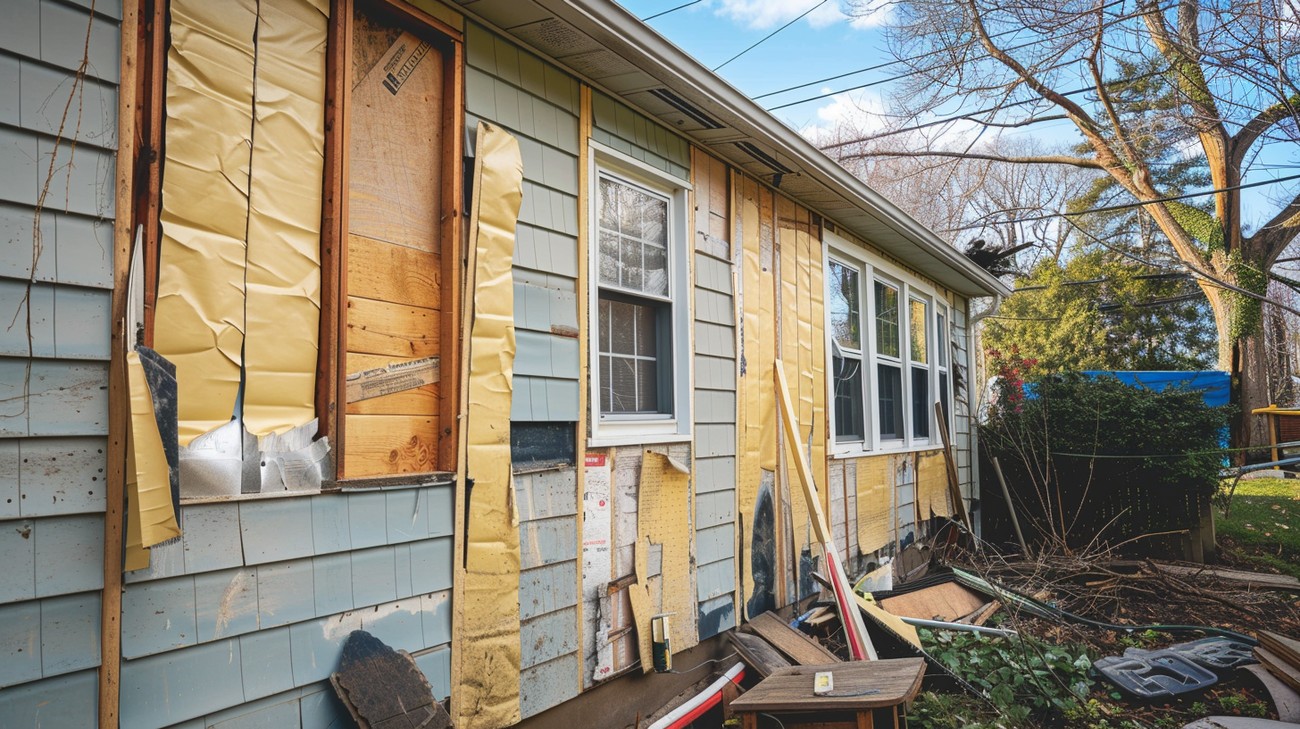
- Hidden Damage: Removing siding can reveal previously hidden issues with your home’s structure, such as rot or water damage.
- Difficult Fasteners: Some fasteners may be rusty or hard to remove, requiring extra effort.
- Weather Delays: Unpredictable weather can hinder the removal process, making it crucial to monitor forecasts.
Benefits of Professional Assistance
While DIY projects are rewarding, sometimes professional help is invaluable. Consider the following benefits:
- Efficiency: Professionals have experience and tools that make the job quicker.
- Safety: They are familiar with the safety procedures to protect your home and themselves.
- Expertise: Professionals can spot issues that you might overlook, ensuring a quality job.
Frequently Asked Questions About Removing Vinyl Siding
How do I start removing vinyl siding from my house?
To begin removing vinyl siding, you'll need a few tools: a siding removal tool (a zip tool), a pry bar, and potentially a hammer and nails for any underlying work. First, locate the section to be removed and place the zip tool under the bottom lip of the siding panel. Carefully unhook the panel from the one below it by moving the zip tool horizontally along the seam. Once it's unhooked, gently pull the panel outward and upward to free it from the nails holding it in place. Continue this process for each panel. Working slowly and methodically will help prevent damage to the siding or underlying structure.
Do I need any specific tools to remove vinyl siding?
Yes, while you could get by with basic tools, having a siding removal tool, commonly known as a zip tool, is highly recommended. The zip tool helps unhook the vinyl siding panels without causing damage. A pry bar is useful for carefully removing nailed-down panels, and a hammer might be necessary if you encounter nails that need some persuasion. If your project involves replacing or inspecting what's under the siding, you might also need a utility knife, a tape measure, and safety gloves to protect your hands.
Can I remove vinyl siding myself, or do I need a professional?
Removing vinyl siding is a project that most homeowners with basic DIY experience can safely tackle themselves, provided they take the proper precautions. Educating yourself about the process, having the right tools, and setting aside adequate time for the job are crucial. However, if you’re unsure about handling exterior features, structural nuances, or potential underlying issues like mold or water damage, it might be wise to hire a professional. Their expertise and efficiency could save you time and potential additional costs.
What should I check for after removing vinyl siding?
Once you successfully remove the vinyl siding, inspect the underlying structure for any hidden issues like rot, mold, or insect damage. Pay close attention to window and door frames, as these areas are common trouble spots. If you find any problems, this is the ideal time to address them. Additionally, check the insulation—if it’s old or sparse, consider upgrading to improve your home’s energy efficiency. Ensuring that the house wrap or vapor barrier is intact and securely adhered will also help in avoiding future moisture problems.
Is there a best season or weather condition for siding removal?
The best time to remove vinyl siding is during mild weather conditions, such as in late spring or early fall. Extreme cold can make vinyl brittle and prone to cracking, whereas high heat can make it soft and more difficult to handle. Besides temperature, avoid working during wet or snowy weather to ensure safety and preserve your home's underlying structure. Choosing a day with clear skies and mild temperatures can provide the optimal environment for siding removal tasks.
How can I ensure my safety while removing vinyl siding?
Prioritizing safety is crucial when removing vinyl siding. Wear safety glasses and work gloves to protect yourself from sharp edges and stray nails. If you're using ladders, ensure they are on stable ground and have someone hold the ladder if possible. Be aware of your surroundings to avoid falling hazards, and take breaks if you're working in direct sunlight to prevent heat-related issues. If you're uncomfortable with heights or unfamiliar with tool use, consider bringing in a friend or professional for assistance.
Can I reuse removed vinyl siding?
Yes, it's possible to reuse vinyl siding if it's been carefully removed and is in good condition. To increase the chance of successful reuse, handle the siding gently during removal to avoid unnecessary bends, cracks, or damage. Inspect each panel for warping or holes, and clean any dirt or debris. Before reinstallation, ensure the panels fit correctly with minimal gaps. Keep in mind that color matching can be tricky if you plan to replace only part of your siding with reused panels, as the sun might have altered the portions that were exposed over time.
Step-by-Step Guide
Tools and Materials Needed
- Zip tool (siding removal tool)
- Flat pry bar
- Hammer
- Utility knife
- Safety goggles
- Gloves
- Ladder
- Marker or pencil
- Bucket or container for nails and screws
- Trash bags or tarp for debris
Preparation Steps
Inspect the Area: Before starting, take a thorough look at the siding you intend to remove. Identify any damaged areas and note how the pieces are layered.
Wear Protective Gear: Safety first! Put on your gloves and safety goggles to protect against sharp edges or unexpected debris.
Find the Starting Point: Begin at the top corner of the section you plan to remove. This will make the process of separating the siding easier as you move downwards.
Set Up Your Ladder: Position your ladder securely so you can comfortably reach the top section of the vinyl siding. Ensure that it is stable and on solid ground.
Gather Tools Nearby: Keep your tools within arm's reach, preferably in a tool belt or a tool caddy nearby, to avoid multiple trips up and down the ladder.
Detailed Instructions
Loosen the Top Edge:
- Use the zip tool to hook the lip of the vinyl siding at your starting point.
- Gently pull downward to unhook the edge from the piece above. Work your way across the entire top section to loosen it completely.
Remove Nails:
- Once the top edge is free, use the flat pry bar to remove the nails securing the siding.
- Place the pry bar under the siding where the nails are located and gently pull them out.
- Collect nails in your bucket or container to prevent accidents.
Separate the Siding Panels:
- With the nails removed, gently pull the siding panel downward to detach it from the piece below.
- If the panels resist, use the zip tool to help separate them at each end.
Cut Obstacles:
- Use the utility knife to cut around any situations where the vinyl is fitted tightly against obstructions like windows or doors.
- Score the siding lightly and run the knife along the mark to ensure a clean cut.
Repeat the Process:
- Continue these steps down the wall, ensuring to safely store each piece of siding removed.
- Stack the removed panels neatly or dispose of them if they are being replaced.
Clean Up:
- Sweep the area to collect any fallen nails or debris.
- Ensure all tools are accounted for and stored away safely.
Tips for Success
- Work on a Dry Day: Vinyl siding is more rigid and easier to handle in cooler, dry conditions.
- Label Panels: If you're reinstalling the siding later, label each panel using a marker as you remove them. This will help in reassembling them correctly.
- Go Slow: Take your time to avoid damaging the panels, especially if they're being reused.
What to Do If Something Goes Wrong
- Panel Cracks: If a panel cracks, assess whether it can be reused. If not, measure the section and prepare to purchase a replacement.
- Cannot Remove Nails: If nails refuse to come out, use the hammer alongside the pry bar to work them out gently, or cut around the problem area to return later with a more robust tool.
- Misaligned Panels: Should you find the panels misaligned during reinstallation, check the guiding lips at the top of each siding piece. Reinstall from the point of misalignment, ensuring each panel sits properly before securing with nails again.
Common Mistakes to Avoid
Using the Wrong Tools
One common mistake when removing vinyl siding is not using the right tools. This happens when homeowners underestimate the tools required for the job, thinking they can manage with what's already in their toolbox. Without the proper equipment, you risk damaging the siding or injuring yourself.
How to Avoid It: Use a siding removal tool, sometimes called a zip tool or siding unlock tool, to easily separate the panels without causing harm. A pry bar and claw hammer can also help with loosening nails or screws.
If You’ve Already Made the Mistake: If you've damaged the siding due to improper tools, inspect it immediately. For minor dents or scratches, replacements might not be necessary. If the damage is significant, purchase new panels and reinstall them using correct methods.
Expert Recommendations: Always research the type of siding you have and ensure your tool selections are appropriate. It saves time, money, and potential headaches.
Not Analyzing Weather Conditions
Another misstep is failing to account for weather conditions. Vinyl siding is sensitive to temperature changes, which can lead to cracking or warping if mishandled in extreme weather.
How to Avoid It: Choose a mild, dry day for siding removal, ideally when the temperature is between 50°F and 70°F. Avoid working in direct sunlight or during rainy and windy conditions.
If You’ve Already Made the Mistake: Should the siding crack due to adverse weather handling, replace those specific sections. Monitoring weather forecasts can help plan any future work.
Expert Recommendations: Plan your project with the weather in mind and consult experts if unsure about the optimal time for your local climate.
Ripping off Siding Panels Forcefully
Forceful removal of panels can cause them to snap. It happens often when individuals are in a hurry or unaware of the interlocking nature of the panels.
How to Avoid It: Be patient and use your siding removal tool to gently separate panels, releasing the interlocking connections.
If You’ve Already Made the Mistake: Replace the broken panels. Ensure you’re familiar with the interlocking system before attempting further removal.
Expert Recommendations: Watch tutorial videos or seek guidance to understand how vinyl siding systems interlock before starting.
Ignoring Structural Issues
Sometimes, underlying structural issues are overlooked during siding removal, such as rot or pests in the sheathing. It occurs when there is no prior inspection before removal.
How to Avoid It: Inspect the condition of the siding and underlying wall structure before removal. Check for any signs of damage or infestation.
If You’ve Already Made the Mistake: If you find structural damage after removal, halt progress and address these issues first. Contact a professional if necessary to repair underlying damage before continuing.
Expert Recommendations: Conduct regular maintenance inspections on your siding, and involve specialists if any hidden problems are suspected before removal.
Failing to Label or Track Panel Order
Mistakes often surface later when panels aren’t labeled or tracked properly, causing re-installation headaches since not all panels are equal.
How to Avoid It: As you remove each panel, label them and note their arrangement, especially around windows and doors.
If You’ve Already Made the Mistake: If panels are mixed, re-align and match them visually. Panels close to each other often have subtle differences.
Expert Recommendations: A simple organizational chart and clearly labeled pieces during removal can save time and frustration during reinstallation.
Neglecting Safety Precautions
Lack of proper safety measures can lead to accidents. This often occurs due to overconfidence or the belief that siding removal is a low-risk task.
How to Avoid It: Wear gloves, safety goggles, and ensure ladders are stable on even ground. Always have a partner to assist you, especially when working at height.
If You’ve Already Made the Mistake: If someone is injured, pause the project immediately and administer first aid. For severe injuries, seek medical assistance.
Expert Recommendations: Prioritize safety equipment and procedures, regardless of the project size, as injuries can disrupt timelines and cause long-term harm.
Disposing of Siding Waste Improperly
Improper disposal of old siding material clutters your space and may violate local disposal regulations. This often happens with a lack of awareness of local waste disposal codes.
How to Avoid It: Research regulations and arrange proper disposal methods ahead of time. Many communities offer recycling facilities for vinyl siding.
If You’ve Already Made the Mistake: If waste is improperly disposed of, retrieve it quickly and comply with local recycling guidelines.
Final Thoughts
When it comes to removing vinyl siding, taking your time and following best practices is essential to avoid damage to your home’s structure. Whether you’re updating your exterior or preparing for a new installation, careful planning can make the process smoother and protect your investment. Remember to gather the right tools, work systematically, and don’t hesitate to ask for help if you’re tackling a larger project.
At US Quality Construction, we specialize in exterior renovations and have proudly served homeowners in Kansas City, MO. If you’re feeling unsure about the process of removing vinyl siding or simply want expert guidance, we’re here to help. Reach out to us to schedule a consultation or request a free estimate. We’re excited to help you transform your home!
Tags: siding, home improvement, renovation,


