


Decks are a prized feature of many homes, providing an outdoor space to relax and entertain. However, time, weather, and pests can take a toll on wooden structures, leading to a problem no homeowner wants to face—deck rot. Addressing deck rot isn't just about keeping your deck looking good; it's essential for the safety and longevity of your outdoor space. In this comprehensive guide, we'll explore the intricacies of deck rot repair, sharing valuable insights and practical advice to help you maintain a safe and beautiful deck.
Understanding Deck Rot
Deck rot is a form of decay that occurs when wood is exposed to moisture over extended periods. This leads to the breakdown of wood fibers, significantly weakening the integrity of the structure. Recognizing the early signs of deck rot can save you time and money on repairs. Look for discolored patches, soft or spongy surfaces, and a musty odor—these are all red flags indicating potential rot.
Causes of Deck Rot
Understanding the causes of deck rot is key to preventing it. Here are some primary culprits:
- Moisture Exposure: Constant exposure to rain, dew, or humidity promotes rot.
- Inadequate Ventilation: Poor airflow under the deck can trap moisture.
- Insufficient Finishing: Lack of sealants or paint leaves wood vulnerable.
- Wood Type: Certain woods are more prone to rot than others.
Evaluating the Extent of Damage
Before diving into repairs, it's crucial to assess the damage. A thorough inspection involves checking every component from the decking boards to the structural supports:
- Inspect the Decking Boards: Look for discoloration or soft spots.
- Examine the Structure: Check joists and beams for any signs of rot.
- Assess the Railings: Ensure they are sturdy and without decay.
- Analyzing Connections: Hardware like nails and bolts should be rust-free and secure.
Essential Tools for Deck Rot Repair
Repairing deck rot requires a variety of tools. Having the right equipment on hand can make the process smoother and more efficient. Here’s a handy checklist:
- Hammer and Nails
- Wood Chisel and Saw
- Drill with Bits
- Measuring Tape
- Deck Cleaner
- Paintbrush or Roller
- Replacement Wood
- Sealant or Wood Preservative
Step-by-Step Repair Process
Once you've understood the extent of the rot and gathered your tools, it’s time to get hands-on with the repair process. Here’s how you can do it:
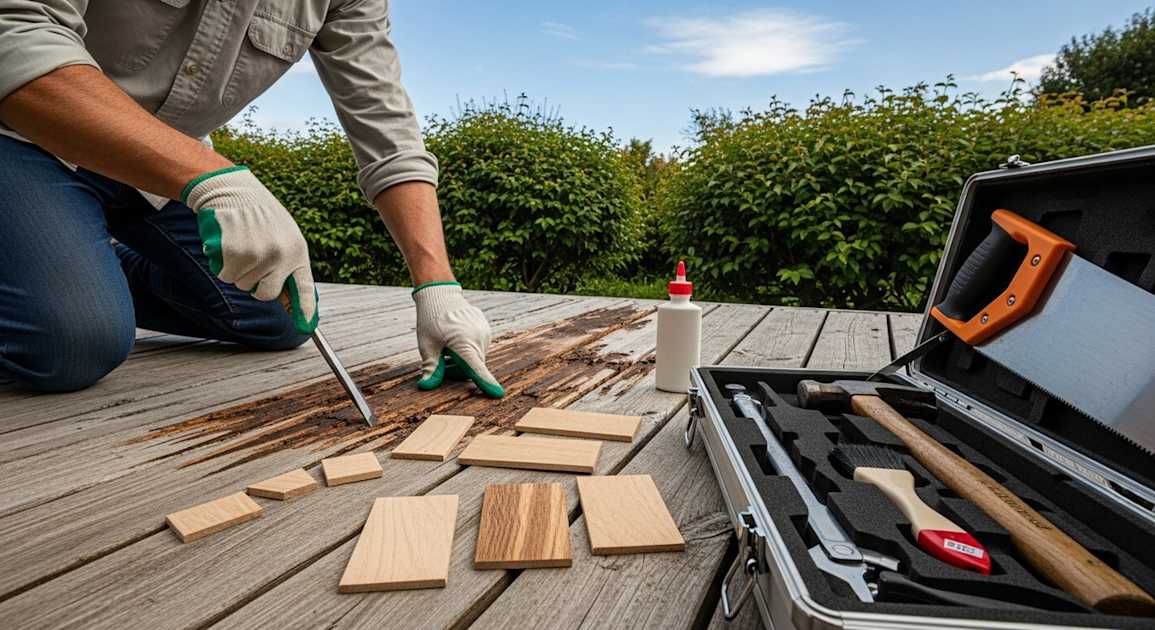
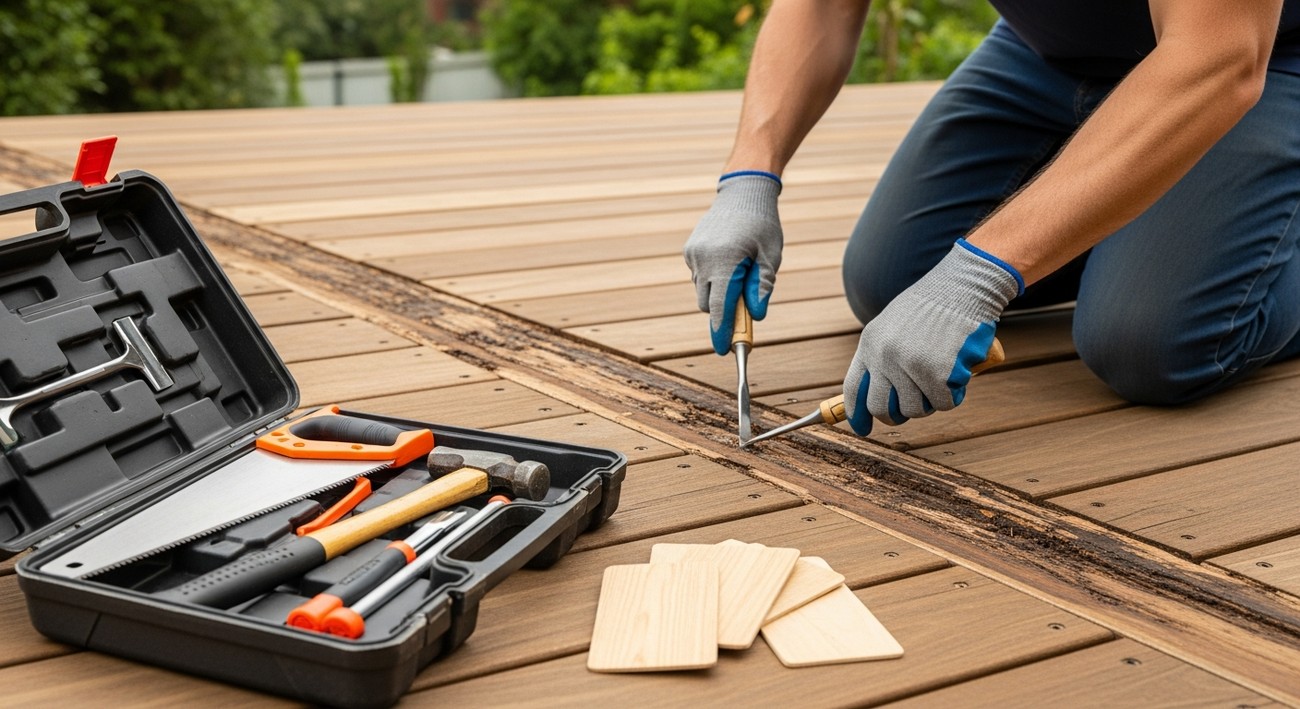
Step 1: Remove Rotted Wood
Begin by removing all the rotted areas. Use a chisel and saw to cut away damaged wood. Ensure you're working in a dry environment to prevent further moisture exposure. For severe cases, replacing entire boards may be necessary.
Step 2: Treat the Area
After removing rotted sections, treat the surrounding area with wood preservative or anti-fungal treatment. This step helps kill any remaining fungus and protects healthy wood from future decay.
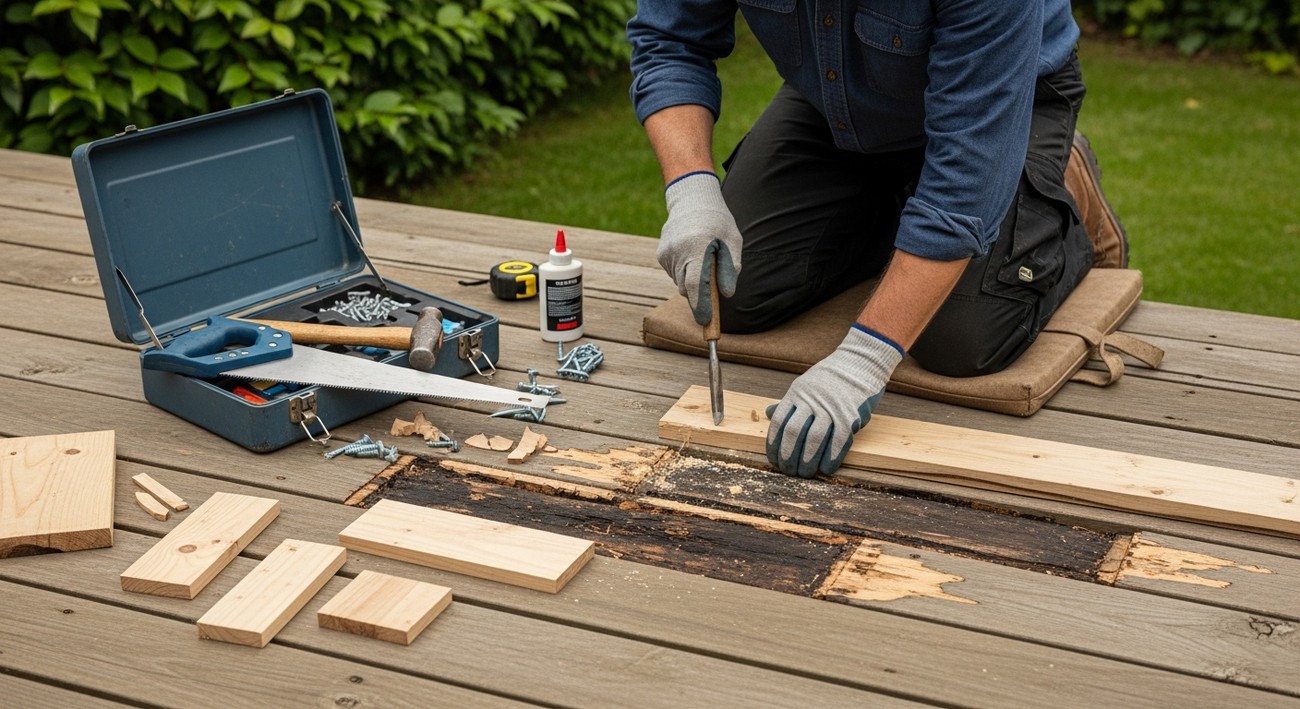
Step 3: Replace and Secure New Wood
Measure and cut replacement pieces of wood to fit the areas where old wood was removed. Secure these with galvanized nails or screws, which resist rust and corrosion. Ensure that all parts are flush to maintain a level surface.
- Board Replacement Tips:
- Align grain direction for aesthetic consistency.
- Use pressure-treated wood for longevity.
Step 4: Seal and Protect
Once repairs are complete, apply a water-repellent sealant to the entire deck. This prevents moisture penetration and prolongs the life of the wood. Choose a sealant that also offers UV protection to prevent sun damage.
Step 5: Maintain Regularly
Regular maintenance is critical to preventing future rot. Clean the deck annually using a deck cleaner. Reseal every two to three years, and ensure all drainage pathways remain unobstructed.
Choosing the Right Materials to Prevent Rot
Selecting the right materials can significantly impact your deck's durability. Here's what to consider:
- Material Selection: Opt for rot-resistant wood such as cedar or redwood. Composite materials also offer resilience against decay.
- Fastener Quality: Use stainless steel or coated fixtures to prevent rust.
- Proper Drainage: Include drainage systems to direct water away from the deck's foundation.
Additional Tips for Longevity
Keeping your deck in pristine condition doesn't end with repairs. Incorporate these practices into your routine to maintain a deck that withstands the elements:
- Regular Inspections: Check your deck each season for any signs of new damage.
- Mindful Landscaping: Ensure plants and soil are not too close, which can increase moisture.
- Appropriate Furniture: Use furniture that doesn’t trap moisture underneath.
FAQ Section on Deck Rot Repair
How do I identify deck rot?
Detecting deck rot early is crucial for effective repair. You'll typically notice signs such as discoloration and softness in the wood. For example, areas where the wood appears darker and feels spongy upon touch are indicators of wood rot. Additionally, check for any mold or fungi growth, as these are common signs of moisture damage leading to deck rot. Regular inspections and maintenance can help spot these signs before the problem becomes severe.
Why does deck rot occur?
Deck rot usually occurs due to prolonged exposure to moisture and inadequate ventilation. Wood is a natural material that absorbs water, and when it doesn't dry out properly, it becomes a breeding ground for fungi that contribute to rot. Additionally, poor installation practices, such as misleading waterproofing measures or neglecting to seal the wood properly, can accelerate this process. Understanding these causes can help in better preventing deck rot issues in the future.
What's the first step in repairing deck rot?
The first step in deck rot repair is assessing the extent of the damage. Begin by inspecting the deck to identify all affected areas. Remove any furnishings or coverings that might obstruct your view. Use a screwdriver to probe questionable areas; if the wood easily gives way, it's rotten and needs attention. After assessing the damage, you'll be able to determine the scope of the repair project and gather the necessary materials.
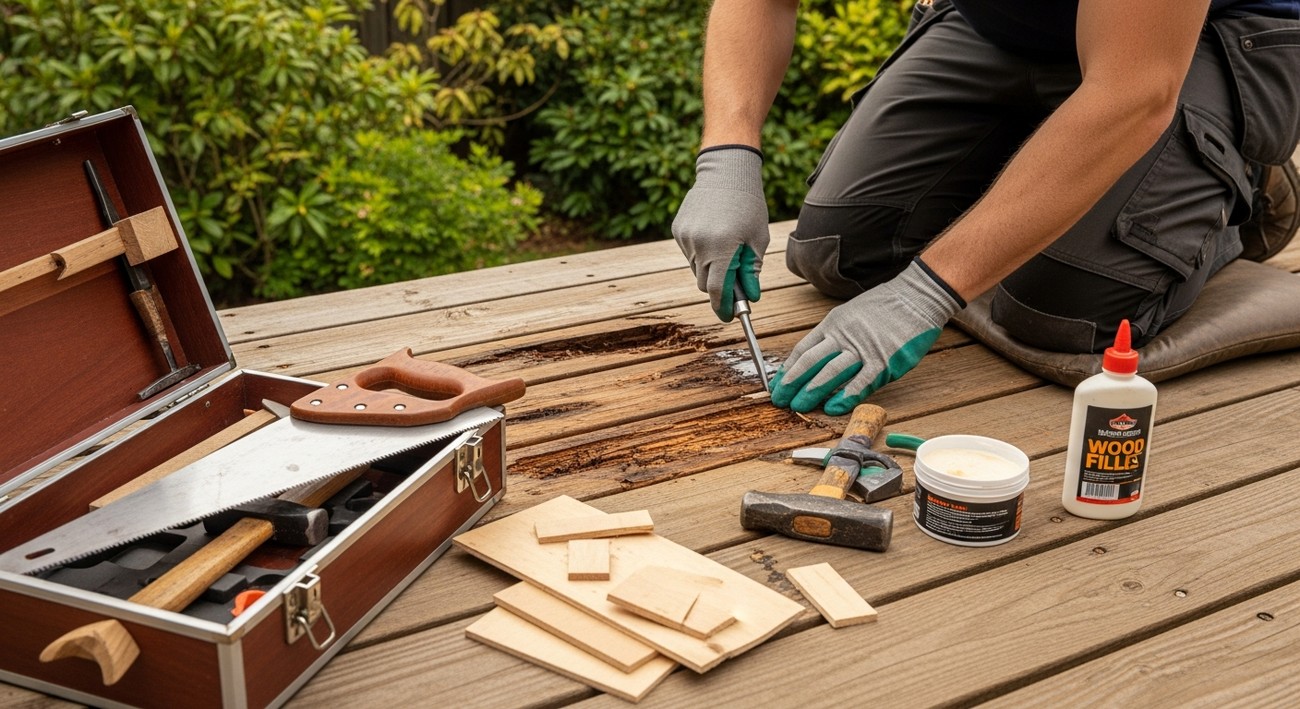
What tools and materials are needed for deck rot repair?
For a successful deck rot repair, you'll need specific tools and materials. Essential tools include a saw, hammer, chisel, drill, screwdriver, and safety gear such as gloves and goggles. For materials, you'll require treated wood to replace the damaged sections, wood filler for minor repairs, sealant, and galvanized screws or nails that resist corrosion. These items will ensure your deck repairs are thorough and long-lasting.
Can deck rot repair be a DIY project?
Yes, deck rot repair can certainly be a DIY project if you have the right tools and a moderate level of carpentry skill. Simple tasks like replacing a few rotten boards or applying wood preservative can usually be handled by homeowners. However, for extensive damage involving structural elements, it may be wise to consult with a professional. This will ensure safety standards are met and that the repair is adequately completed.
How long does deck rot repair take?
The time needed for deck rot repair varies depending on the severity of the damage and the scope of your project. Small repairs, such as replacing a couple of boards or applying a wood preservative, might take a few hours. However, more complex repairs, involving structural components, could take several days, especially if you’re waiting for treatments or finishes to dry. Planning your time accordingly is essential to avoid disruptions.
How can I prevent future deck rot after repair?
To prevent future deck rot, regular maintenance is key. Ensure your deck is sealed adequately using weatherproof sealants, and reapply them as needed—typically every two to three years. Keep the deck clean and free of debris, which can trap moisture. Ensure proper drainage around the deck to avoid standing water, and consider applying a wood preservative. Finally, perform regular inspections, so you can address potential problems promptly before they escalate.
Is it necessary to replace all affected wood in deck rot repair?
It's not always necessary to replace all the affected wood when performing deck rot repair. If the rot is superficial, wood fillers and sealants can treat small, isolated cases effectively. For areas where the rot has penetrated deeply, replacing the wood might be the better option. Assess each area individually to determine the best course of action, as this can save materials and keep the repair process efficient.
What costs are involved in deck rot repair?
The costs associated with deck rot repair can widely vary based on the extent of damage and the materials you choose. For minor repairs using wood fillers and sealants, you might spend less than a hundred dollars. On the other hand, replacing large sections of a deck can be more costly, especially when considering labor if you opt for professional services. To budget effectively, get several quotes and choose materials that balance quality and affordability.
When should I consider hiring a professional for deck rot repair?
Hiring a professional for deck rot repair should be considered when the damage is extensive, particularly if it affects the deck's structural integrity. If you're dealing with rot in load-bearing beams or posts, professional expertise ensures safety and adherence to building codes. Additionally, if you lack the necessary tools or experience, a professional can often complete the job more efficiently and provide guarantees on their work, offering peace of mind.
Troubleshooting Guide
1. Spotting on Deck Surface
Symptoms: Discoloration, small circles, or spots appearing on the deck.
Likely Causes: Water pooling, high humidity, or poor ventilation.
Fixes:
- Start by clearing any debris from the surface.
- Lightly sand the affected areas to remove discoloration.
- Apply a wood cleaner specifically designed for decks. Follow the manufacturer's instructions for optimal results.
- Once dry, reapply a suitable wood sealant to prevent future spotting.
When to Call a Professional: If spots cover a significant area and the wood seems soft or crumbly upon touch.
Prevention Tips: Regularly sweep your deck and ensure it's free of standing water. Ensure good airflow around and under the deck.
2. Soft Spots Underfoot
Symptoms: Feeling spongy or soft areas when stepping on the deck.
Likely Causes: Moisture penetration leading to wood decay.
Fixes:
- Identify and mark all soft areas.
- Carefully remove the compromised boards using a pry bar.
- Inspect the joists underneath and replace any that are rotten.
- Replace with new, pressure-treated lumber, ensuring it's securely fastened.
- Finish the new boards with weatherproof stain or sealant.
When to Call a Professional: If the soft spots are widespread or you notice structural issues in the supporting framework.
Prevention Tips: Regularly inspect the deck for drainage effectiveness and re-seal it every few years.
3. Warping or Bowing Boards
Symptoms: Deck boards appear twisted, curled, or uneven.
Likely Causes: Fluctuations in temperature and moisture content.
Fixes:
- Remove warped boards using a screwdriver or drill.
- Try to flatten them by soaking in water and using weights to hold them down as they dry.
- If repair isn’t viable, replace with new boards that match in size and material.
- Ensure new boards are properly fastened and sealed.
When to Call a Professional: When multiple boards are warped, indicating underlying structural issues.
Prevention Tips: Use high-quality, pressure-treated wood and allow gaps between boards for expansion.
4. Peeling or Flaking Stains
Symptoms: Noticeable flaking or peeling of the deck surface finish.
Likely Causes: Poor deck preparation or using an incompatible stain.
Fixes:
- Power-wash the deck to remove all loose stain.
- Sand down rough areas with a medium-grit sandpaper.
- Clean the surface thoroughly and allow it to dry completely.
- Apply a new coat of high-quality stain, following the product directions.
When to Call a Professional: If stain issues persist despite following these steps.
Prevention Tips: Ensure the deck is dry before application and choose products suitable for your climate.
5. Fungal Growth (Mold and Mildew)
Symptoms: Dark spots, green growths, or ammonia-like odors.
Likely Causes: Excess moisture, shaded areas, lack of proper deck sealant.
Fixes:
- Scrub affected areas using a mixture of water and vinegar or specialized deck cleaning products.
- Rinse thoroughly and let dry completely.
- Apply a mold-inhibiting stain or finish.
When to Call a Professional: If structural integrity is compromised by rot or persistent mold growth.
Prevention Tips: Keep your deck clean and apply a protective sealant regularly.
6. Loose or Wobbly Railings
Symptoms: Railings move easily when pressure is applied, or you hear squeaking sounds.
Likely Causes: Loose fasteners or rotting posts.
Fixes:
- Inspect and tighten all screws and bolts.
- If tightening doesn't work, remove hardware and replace with longer, more robust fasteners.
- For rotted posts, replace them entirely and ensure new posts are securely set.
When to Call a Professional: If you’re unable to stabilize the railings or if the deck is elevated and poses safety risks.
Prevention Tips: Regularly check the condition of railings, especially after storms or heavy use.
7. Splintering Boards
Symptoms: Frayed wood fibers, hazardous splinters.
Likely Causes: Sun exposure, weathering, and age of wood.
Fixes:
Common Mistakes to Avoid
Ignoring Underlying Moisture Issues
Why it Happens:
Deck owners often focus solely on the visible rot, neglecting the underlying moisture problems that caused it. This happens because it seems faster and cheaper to patch the surface instead of investigating deeper issues.
How to Avoid It: Always determine the source of moisture before beginning repairs. Thoroughly inspect for leaks, drainage issues, or improper ventilation that might be causing the wood to remain moist. Using moisture barriers and ensuring proper drainage are preventative measures.
What to Do if You've Already Made the Mistake: If you've patched a rotting area without addressing the source, revisit your deck to identify where moisture might be coming from. Fix any identified issues and consider replacing affected wood again if the damage persists.
Expert Recommendations: Consult with a structural engineer if unsure about drainage or structural concerns. They can provide insights into preventing repeated issues.
Using Improper Materials
Why it Happens:
Some homeowners try to save money by using interior-grade wood or unseasoned lumber, thinking they can get by with these cheaper options.
How to Avoid It: Always use pressure-treated lumber or wood labeled specifically for outdoor use. These materials are designed to withstand the elements and resist decay.
What to Do if You've Already Made the Mistake: Replace any improperly used materials as soon as possible. This will prevent further rot and ensure the structural integrity of your deck.
Expert Recommendations: Purchase materials from reputable suppliers and don't hesitate to ask for help if you're unsure which wood to choose.
Skipping Protective Finishes
Why it Happens:
In the hurry to complete a project, homeowners might skip sealing or staining the wood afterward, assuming the material itself will suffice.
How to Avoid It: Always apply a sealant or stain to the repaired areas of your deck. This helps protect against moisture and UV damage, significantly extending the life of your repairs.
What to Do if You've Already Made the Mistake: Apply a protective finish as soon as possible. Clean the area properly before applying to ensure the finish adheres correctly.
Expert Recommendations: Opt for products explicitly marked for outdoor use and follow the manufacturer's instructions for application frequency.
Inadequate Preparation of the Repair Area
Why it Happens:
Rushing to fix the problem often leads to insufficient cleaning or sanding of the area before applying new materials, resulting in poor adhesion.
How to Avoid It: Take the time to thoroughly clean and sand the area around the rot. This ensures that new wood or compounds can adhere properly.
What to Do if You've Already Made the Mistake: If repairs are failing, remove the new materials, clean and prepare the site thoroughly, and apply the new materials again.
Expert Recommendations: Using a power sander and high-quality cleaning agents are advised for effective preparation.
Cutting Out Too Little of the Rot
Why it Happens:
Attempting to minimize repair time or material costs leads to less thorough removal of damaged wood.
How to Avoid It: Ensure you remove all visibly rotted wood and even some healthy wood around it to ensure that no rot remains.
What to Do if You've Already Made the Mistake: Reinspect the area, and if you see signs of further decay, reassess your cutting depth and remove additional material as needed.
Expert Recommendations: Err on the side of caution; better to remove a little too much than too little when dealing with rot.
Overlooking Fasteners
Why it Happens:
Fasteners can be easily forgotten, or their importance underestimated, resulting in the use of improper or corroded materials.
How to Avoid It: Use stainless steel or other corrosion-resistant fasteners, specifically designed for outdoor use.
What to Do if You've Already Made the Mistake: Swap out any inadequate fasteners immediately to prevent structural failure or accelerated damage.
Expert Recommendations: Keep a variety of outdoor-rated fasteners on hand to handle any unforeseen needs during repairs.
Neglecting Regular Maintenance Post-Repair
Why it Happens:
It's easy to assume that solving the immediate problem will prevent future issues, without establishing a routine maintenance plan.
How to Avoid It: Set regular maintenance and inspection schedules to catch new rot early and prevent it from spreading.
What to Do if You've Already Made the Mistake: Inspect your deck for signs of new rot or weakness, address any issues promptly, and create a maintenance routine.
Final Thoughts
Taking care of deck rot repair promptly can save you from more extensive damage and costly replacements down the line. Our tips should help you identify the signs of rot early and understand the steps to tackle it effectively, ensuring your deck remains a safe and enjoyable space for you and your loved ones to create memories.
If you’re in the Kansas City, MO area and find yourself facing deck issues, we’re here to help. At US Quality Construction, we pride ourselves on being your trusted local experts, ready to assist with all your deck repair needs. Whether you're looking for a consultation or a free estimate, don’t hesitate to reach out to us—we’re just a call away and eager to help restore your deck to its former glory!
Tags: wood deck, rot repair, home improvement,


